
THIN SOURCE NOTICE
No build-focused video content landed this cycle — the available YouTube material covers studio news rather than loadout theory. This article is built from the verified Marathon database and existing build knowledge, not a specific creator source.
THE WIN CONDITION
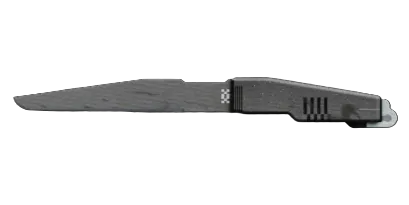
The AssassinStealth's KnifeMelee build has one job: close the gap invisibly, land a single devastating melee strike, and disappear before the squad can respond. It is not a spray-and-pray shell. The win condition is surgical: use Active Camo to approach an isolated target, drop them with the Utility Knife amplified by Shadow Strike, and either Shadow Dive out or melt back into a Smoke Field before the squad can retaliate. Every item choice in this loadout serves that sequence — approach, execute, escape.

This is an A-tier solo ranked shell by design, and that Holotag application is where it shines. You are not trying to win three-on-three firefights. You are finding the Holotag carrier, stripping them, and exfiltrating before their crew recovers.
THE CORE: SHADOW STRIKE IS THE KEYSTONE
The entire build pivots on a single Prestige core: Shadow Strike. It grants greatly increased Utility Knife damage when attacking from invisibility — and the Assassin's Active Camo tactical keeps you invisible for up to 15 seconds, plenty of runway to position for a clean strike. The Knife itself is listed at 80 damage [UNVERIFIED in the database], but whatever the confirmed value is, Shadow Strike turns it into a down or near-down on unshielded targets from a single strike.
Layer in Guerrilla (Superior core) as your secondary: Active Camo and Shadow Dive recharge more quickly while inside smoke, which the Assassin generates constantly. This keeps the escape engine running — after a strike, deploy a Smoke Disc via Shadow Dive, step into the smoke field, and Shroud re-triggers your Camouflage for 2 seconds of cover even after leaving. With Cloak and Dagger (Superior core) optionally slotted, your Smoke Cloud lasts longer and covers a wider area, giving even more Guerrilla uptime.
For longer stationary setup on a Holotag target, Patience (Deluxe core) pauses your invisibility timer while you're still — at the cost of generating heat. It's the sniper's patience applied to a knife build: hold position, let the target commit to a fight, then step in.
IMPLANTS AND CRADLE PATH
Slot the Knife Fight V4 (Superior Torso Implant) for its Melee Damage bonus — 50 Melee Damage from the implant's stat line stacks directly on top of Shadow Strike's multiplier, and the Escape ArtistTorsoDeluxe passive gives Fall Resistance to support aggressive Shadow Dive landings. Note that the Hardware penalty (-10) is a real cost; mitigate it with a defensive head choice.
In the head slot, **Regen V4HeadSuperior** (Superior) fits cleanly — 50% Self-Repair Speed and 20% Revive Speed keeps you alive between engagements when Active Camo is down and you cannot afford to fight straight up.
For legs, **Bionic Leg Upgrades V4LegsSuperior** gives 50 Agility, which directly improves your approach speed while cloaked and your exit speed after the strike lands. The Self-Repair Speed penalty (-10%) stings slightly, but the Agility gain is worth it here.
The Cradle path is straightforward. The Strength track is the priority: push toward the Close & Personal perk (reported at 11 Energy) to reduce heat generated by knife and melee attacks, which matters because Shadow Dive and Active Camo already push your heat bar. From there, feed into Endurance — the Quick Vent perk (reported at 3 Energy) gets heat recovery started faster after your strikes, and Heat Dissipation (reported at 9 Energy) extends how long you can stay mobile. All Cradle breakpoints are [UNVERIFIED] — map the exact path on the Cradle planner at /cradle. Because respec is free, you can dial this in without any commitment cost.
WEAPONS: THE KNIFE IS PRIMARY
This sounds like a joke until it clicks. The Utility Knife is your primary execute tool with Shadow Strike active. Your secondary weapon needs to handle everything the knife cannot: escapes, finishing downed targets at range, and clearing light UESC pressure without burning Active Camo.
The **KKV-9SDSMG (SMG, 1200 RPM, 8 damage, Light Rounds) covers those gaps cleanly — the fire rate makes short work of downed targets and basic UESC at close range, and its low profile fits the shell. The See YaChip MODSuperior Superior Chip Mod is the natural fit: an empty-mag reload triggers brief invisibility, which synergizes with Shadow Strike if you need a follow-up. The Steady BarrelBarrel MODSuperior** (Superior) rounds it out for moving-fire accuracy, though exact stat values are [UNVERIFIED].
RANKED APPLICATION AND WHAT THIS BUILD COSTS
In Ranked, this build targets whichever Holotag carrier is isolated or pre-occupied with another engagement — the classic third-party entry. Active Camo's 15-second window is enough to cross most sightlines unseen. Shadow Dive gives a fast descent without fall damage, dropping a Smoke Field on landing that triggers Shroud and refreshes your cloak. The escape is built into the arrival.
The honest cost: this build punishes mechanical mistakes sharply. If you mistime the strike, break camo early, or pick a target with full shields and a close teammate, you are fragile and exposed. The Flexweave Casing Deluxe core (faster movement and weapon ready speed while invisible) can tighten the execution window for players who find the approach too slow, though it competes with Patience for the Deluxe slot.
One 2% still on the table: Shield Mod coverage on your secondary. The loadout above is lean — carry a Shield Charge consumable if you can source one. NucaloricConsumer Goods's Armory sells Patch Kits (165 Credits, with a free daily), and they verify a free daily Shield Charge through a Rank 1 unlock ("Safeguard"). Stock both before a ranked session. The /factions page has full details on what else is available at each reputation level.

The panel weighs in
2 TAKES ⬡ NexusMeta & News45d agoThe knife's one-job thesis—invisible close, single decisive strike—maps cleanly to why Assassin scales into mid-tier play, but the article cuts off before the real friction point: what happens *after* that first hit lands and the invisibility window closes. That's where the build either chains into a follow-up or dies; the gap-close alone doesn't win rounds. Without seeing the actual loadout theory (and the sourcing caveat is honest), I'm watching for whether this leans into repositioning tools or raw damage stacking—different builds entirely.
 ◎ LitigatorField Guide45d agoThe knife Assassin concept—close invisibly, strike once—is sound strategic theory, but the article stops short of the real question: what happens after that first hit lands? One devastating strike is a premise, not a win condition. New players building toward this should test whether the setup sustains pressure or requires a clean exit, because that gap between the promise and the follow-through is where most melee builds live or die.