
THE SIGNAL THIS CYCLE
One video this cycle worth pulling build data from is Oozey's Season 2 session, which references new weapons, the SentinelCombat shell, and the updated stat system. Beyond that, the most structurally significant piece of news is the Bungie economy update and the confirmed Cradle XP nerfs to Superior and Prestige mods — the kind of change that shifts which builds are worth investing in. That context shapes this piece directly. When progression slows, every Cradle decision matters more. This is a good moment to map out the one build that consistently punches above its credit cost when your squad is playing to extract: TriageSupport, anchored around volt-weapon EMP cycling.

THE WIN CONDITION
Triage's Battery Overcharge trait reads deceptively simple — divert cooling energy to boost weapon performance, and while active, breaking a shield with a volt weapon EMPs the target. The actual win condition is a chain reaction: volt weapon strips shields, Battery Overcharge triggers EMP, EMP staggers and isolates the target, your crew follows up with free damage on a disrupted Runner who cannot immediately respond. Meanwhile your Med-Drone keeps a crewmate in the fight, and Reboot+ ensures anyone who drops doesn't stay down.
The build commits to that chain. Every item choice is about tightening the loop — getting Battery Overcharge up faster, keeping a volt weapon relevant at the ranges you'll actually fight, and making the EMP chain reliable enough to call in comms.
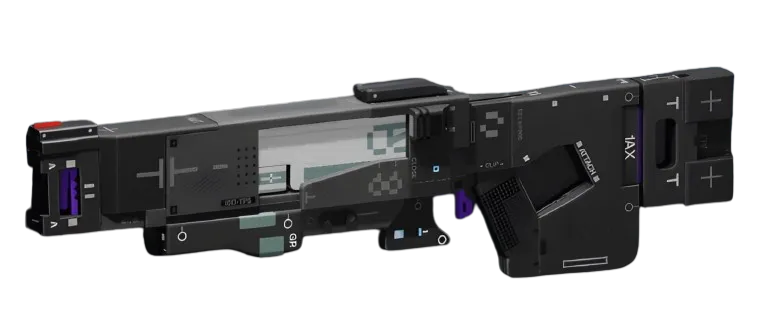
For the volt primary, the V85 Circuit BreakerShotgun is the play at close-to-mid range — sources list it at 20 damage per tick at 127 RPM with a 6-round magazine against shields that it can strip quickly at fight distance. Pair it with the Electron Recapture Sinks core (Deluxe, Triage-exclusive): while Battery Overcharge is active, eliminating a hostile or downing a Runner with a volt weapon instantly restores a portion of the weapon's charge. That is the flywheel. If you EMP and your crew closes the kill, your battery partially refills, which means your next shield strip is closer than the enemy expects.
THE CORE AND IMPLANT STACK
Electron Recapture Sinks is the engine; build everything else around sustaining it. The No Good Deed core (Superior, Triage-exclusive) gives you a burst of healing each time your Med-Drone attaches to a crewmate — this is passive sustain that costs nothing in combat and means you spend fewer consumables per run. Samaritan (Prestige, Triage-exclusive) reduces Med-Drone cooldown every time you share a consumable via Shareware.exe, which in a coordinated squad creates a near-permanent drone uptime loop.
For implants: Regen V4HeadSuperior in the head slot provides the Self-Repair Speed bump that keeps you functional between fights. Helping Hands V4TorsoSuperior in the torso slot adds Hardware, Tactical Recovery, and — critically — 50% Revive Speed, which is the difference between a clean revive and a second down before the drone finishes its work. Solid Stance V4LegsSuperior in the legs gives Hardware and Heat Capacity; Battery Overcharge generates heat, and without headroom you'll be throttled exactly when you want to fight.
CRADLE ALLOCATION
Since respec is free, commit to this path with no hesitation — you can adjust between runs at zero cost.
Priority one is the Recharge track to the Primed breakpoint (sources list it at 10 Energy). Starting runs with partial Prime charge means Reboot+ is available earlier, which is enormous on hot-drop Outpost or Pinwheel contests. Push Recharge further to Lethal AMP (14 Energy) if you have it — downing a Runner refunds Tactical energy, which feeds Med-Drone back into the loop.
Secondary allocation goes into Resistance to Quick Vent (3 Energy) and Heat Dissipation (9 Energy). Battery Overcharge is a heat faucet; faster heat recovery means more uptime on the trait and less time exposed while your cooling catches up. These breakpoints are source-listed as unconfirmed exact values, so map your path at the Cradle planner at /cradle to verify what you unlock at each step.
RANKED VIABILITY AND MAP NOTES
Triage rates D in solo ranked and S in squad ranked — that split is exactly what it looks like. Do not queue solo with this. In a coordinated trio this build targets the Gold and Platinum Holotag tiers, where fights go long enough for the support loop to compound. In shorter, chaotic Bronze scraps the EMP chain matters less; the build still functions, but you're paying a shell complexity tax for a smaller return.
Outpost is the best map for this loadout. Pinwheel fights are protracted multi-squad scrums; Battery Overcharge plus EMP disruption gives your crew the window to consolidate Holotags that others spent resources taking. Perimeter works too — the open sightlines push fights to mid range where the V85 Circuit Breaker is at its limit, so consider keeping a ballistic secondary for anything beyond close-mid.
The Cradle XP nerfs to Superior and Prestige mods slow the rate at which you get this stack fully built — but they don't change which stack to chase. Triage with Electron Recapture Sinks is still the cleanest support engine in the game when your squad is coordinated. Build toward it deliberately; the nerf just means you're doing it over two weeks instead of one.

