
THE TANK WALL STRATEGY
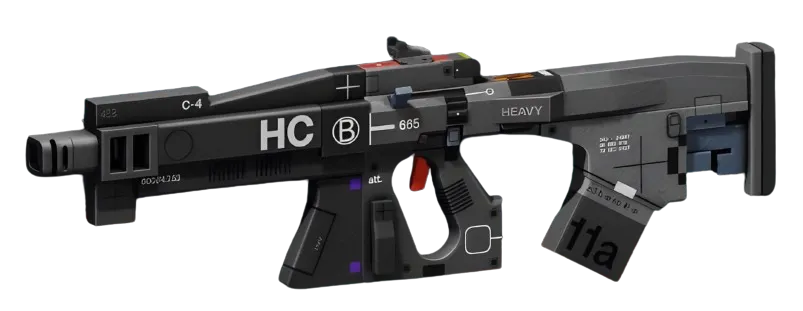
DestroyerCombat's ranked solo dominance comes down to one core principle: you are the immovable object that forces Holotag engagements on your terms. Post-1.0.6.3, with combat feedback changes making sustained fights more rewarding, Destroyer's Iron Frame passive and 175 HP pool create the perfect storm for controlling ranked engagements. The optimal build leverages Impact HARAR as your primary weapon — 24 damage per shot at 400 RPM gives you the stopping power to force trades while your superior health pool wins the attrition game.

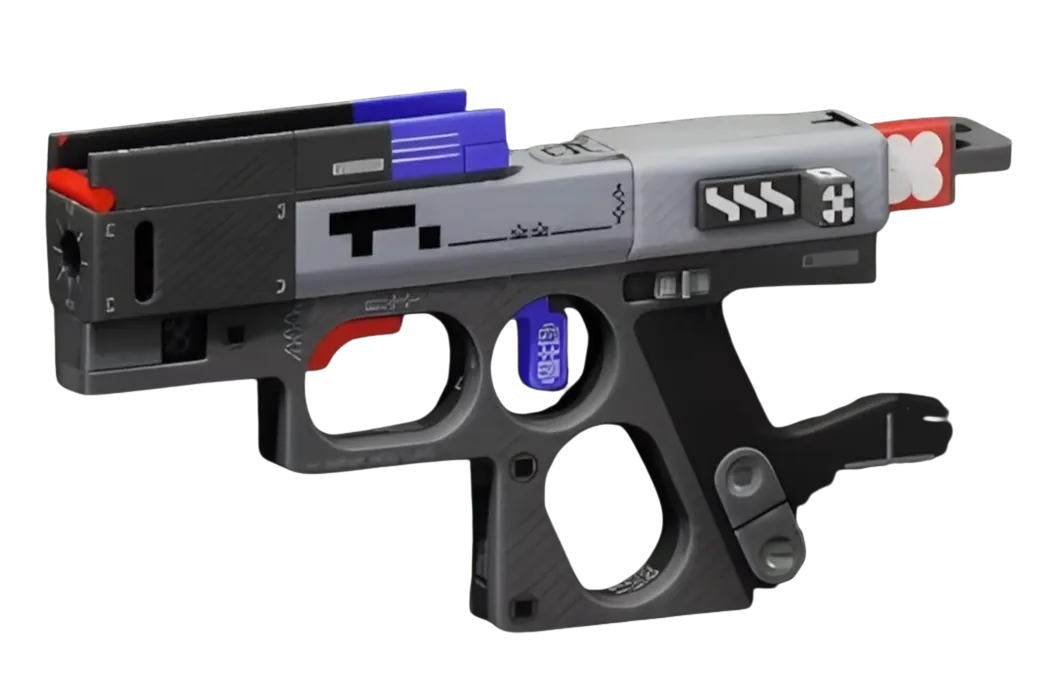
Your secondary is Magnum MCPistol for close-range cleanup. At 33 damage per shot, the Magnum eliminates wounded targets before they can disengage. The beauty of this pairing: Impact HAR controls mid-range where most Holotag fights happen, Magnum MC punishes anyone who tries to rush your position. You're not chasing kills — you're making other players come to you, then winning because you can tank more damage than any shell except Destroyer mirror matches.
CORE LOADOUT BREAKDOWN
Impact HAR gets the Pinpoint BarrelBarrel MODSuperior for maximum stability and range control. This mod transforms the weapon into a mid-range laser that forces other shells to either engage you in your optimal range or give up map control entirely. Pair this with Oracle LensOptic MODSuperior for faster ADS speed — you need to be first on target when engagements start because your slow movement speed means you can't reposition if you lose the initial trade.
Your core selection centers on Impact Siphons — the Prestige core that returns incoming Riot Barricade damage as shield energy. This creates a feedback loop where aggressive players actually fuel your sustainability. Combined with Bullrush for energy-free tactical sprinting behind your barrier, you become a mobile fortress that gets stronger the more players try to break you down.
For implants, prioritize Helping Hands V4TorsoSuperior in the torso slot for the Hardware boost and revive speed increase. The 20 Hardware directly synergizes with Impact Siphons by making your barrier more durable, which means more returned shield energy. Distance Runner V4LegsSuperior in legs compensates for your slow base speed with Heat Capacity increases, letting you maintain tactical sprint longer. Head slot takes Augmented Capacitors V4HeadSuperior for 30% Prime Recovery — more frequent Search and Destroy volleys means more area denial.
WIN CONDITION AND EXECUTION
Your win condition is simple: force every ranked engagement to happen within 30 meters of your Riot Barricade. The post-1.0.6.3 combat changes reward sustained gunfights, and no shell can out-sustain Destroyer when you're fighting from behind your barrier with Impact Siphons returning damage as shield energy. Most ranked players still think Destroyer is about rushing with Search and Destroy — that's the trap pick approach.
The S-tier execution is positioning yourself between Holotag spawns and common extraction routes, then making other shells come to you. Impact HAR's 18-round magazine and solid damage output means you win most trades even without the barrier, but when you combine your health advantage with Impact Siphons' energy return, you become nearly impossible to dislodge. Vandals can't out-trade you. Assassins can't one-shot you through your combined health and shield pool. Thieves can't escape once you've tagged them with the Impact HAR.
The meta shift post-1.0.6.3 has made defensive play more viable, and Destroyer with this loadout represents the ultimate defensive anchor. You're not trying to chase down Holotag carriers — you're making them come through you to extract, then winning because your kit is built for exactly this scenario.


