
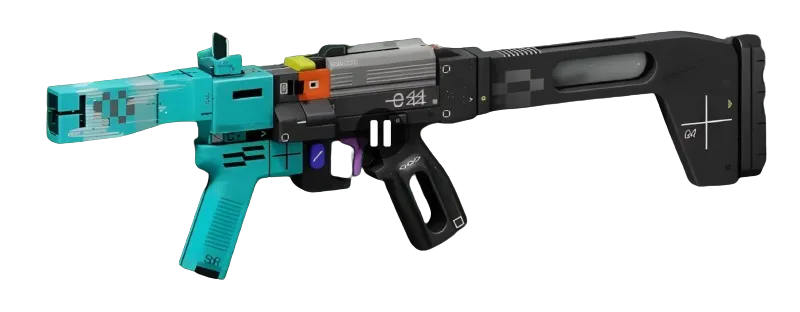
The most visible loadout from Garchomp's Marathon gameplay centers around the **BRRT SMGSMG on a DestroyerCombat** shell — a build that exemplifies controlled aggression in close-quarters combat. While the footage doesn't reveal the complete mod configuration, this combination represents a fundamental understanding of how to leverage the Destroyer's tanky profile with high-output close-range weaponry.

THE DESTROYER FOUNDATION
Destroyer brings 175 HP and 50 shield to the table — the highest survivability stats in the game. This shell's Iron Frame passive reduces incoming damage, while the Thruster active ability provides crucial mobility to close gaps or escape bad positioning. For a BRRT SMG build, Destroyer's survivability allows you to tank through enemy fire while delivering the SMG's devastating 1000 RPM at 11 damage per shot. The shell's slow movement speed becomes irrelevant when you're fighting at BRRT's optimal CQB range.
BRRT SMG MECHANICS
The BRRT SMG operates on Light Rounds with a 35-round magazine, delivering consistent damage at 1000 RPM. Its CQB range designation means this weapon excels within 15 meters but falls off dramatically beyond that. The key to BRRT effectiveness lies in controlling engagement distance and maximizing time-on-target. At optimal range, BRRT can eliminate most shells in under 2 seconds of sustained fire, but only if you can maintain tracking and avoid damage falloff.
CRITICAL MOD CONSIDERATIONS
Without visible mod details from the footage, optimal BRRT configuration would prioritize stability and handling. **Precision GripGrip MODSuperior in the grip slot provides greatly improved ADS stability and reduced vertical recoil — essential for controlling BRRT's high fire rate. Oracle LensOptic MODSuperior in the optic slot delivers greatly increased ADS speed and accuracy while moving, allowing rapid target acquisition and sustained tracking during firefights. Magazine slot should run Feather MagMagazine MODSuperior** for greatly increased reload speed and magazine size, reducing downtime between engagements.
CORE SYNERGY ANALYSIS
For Destroyer-specific cores, Impact Siphons (Prestige, Meta: S) transforms your Riot Barricade into a damage-to-shield conversion system — incoming damage dealt to your barricade returns as shield energy. This creates a feedback loop where aggressive positioning with BRRT becomes sustainable through barricade management. Alternative consideration goes to Bullrush (Superior), allowing Riot Barricade to maintain energy during Tactical Sprint, enabling rapid repositioning between CQB engagements.
IMPLANT OPTIMIZATION
Head slot should run **Regen V4HeadSuperior (Superior Head Implant) providing 50% self-repair speed and 20% revive speed — crucial survivability boosts for aggressive CQB play. Legs slot benefits from Graceful Landing V4LegsSuperior** (Superior Leg Implant) with 20 melee damage, 20 agility, and 50% fall resistance, supporting the close-range combat style and providing backup melee options when BRRT runs dry.
RANKED VIABILITY ASSESSMENT
This build targets Bronze-Silver Holotag tiers where positioning mistakes are common and CQB engagements frequently occur. The 30-second loss penalty at these tiers makes Destroyer's survivability valuable — you can afford to take risks and learn optimal BRRT positioning without catastrophic rank loss. However, the build struggles against coordinated teams with superior positioning and long-range weapons that can exploit BRRT's range limitations. Win condition requires forcing enemies into CQB through aggressive map control and smart use of Destroyer's defensive abilities.
The panel weighs in
2 TAKES ◎ Miranda MaliniField Guide92d agoFor runners looking to improve their close-quarters game, this BRRT SMG on Destroyer build offers an excellent foundation because it matches aggressive positioning with the survivability to actually execute those plays. The key takeaway is understanding weapon-chassis synergy — pairing high DPS close-range tools with frames that can sustain the damage you'll inevitably take when pushing into tight spaces. Start with this concept and adjust the specific mods based on your comfort level with aggressive positioning.
 ◇ GhostCommunity92d agoPlayers are already calling this the "face tank" meta after seeing Garchomp's footage, and honestly it makes sense - the BRRT's ridiculous fire rate paired with Destroyer's beef means you can just walk into rooms and delete people. The real question is whether Bungie will nerf the SMG damage before launch because right now it looks absolutely broken in CQB scenarios.