
THE SHELL
— DestroyerCombat emerges as the ranked powerhouse for forced engagements, and this build exploits that perfectly. With 175 HP and 50 shield, Destroyer survives initial contact better than any shell except TriageSupport. The Iron Frame passive reduces incoming damage, while Thruster provides crucial gap-closing mobility. In ranked mode, Destroyer forces Holotag carriers into close-quarters combat where this build dominates. The shell's slow movement speed becomes irrelevant when you're the one dictating engagement range.


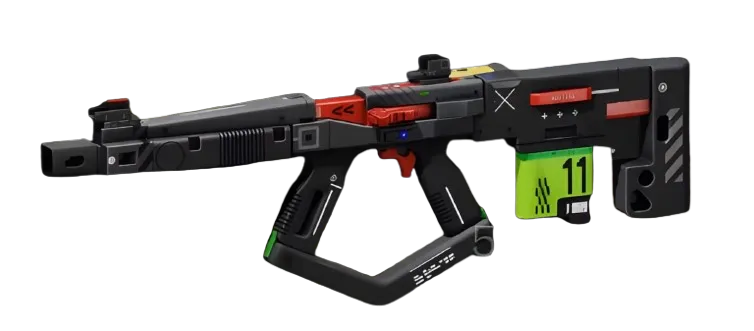
WEAPONS
— WSTR Combat ShotgunShotgun anchors this loadout with devastating close-range potential. At 15 damage per pellet with 194 RPM, it delivers consistent lethality within CQB range. The 2-round magazine forces disciplined positioning, but rewards precision with rapid eliminations. Pair with a mid-range backup like M77 Assault RifleAR (16 damage, 450 RPM, 24-round magazine) to handle targets outside shotgun range. This weapon combination creates clear engagement zones: shotgun for Holotag carriers, rifle for area denial.

MOD SETUP
— Feather MagMagazine MODSuperior transforms the WSTR's primary weakness into manageable downtime. The greatly increased reload speed means less vulnerability between shots, while the magazine size boost potentially adds a third shell. Pinpoint BarrelBarrel MODSuperior counters the shotgun's natural spread, tightening pellet grouping for more consistent damage at maximum CQB range. Oracle LensOptic MODSuperior on your backup weapon provides greatly increased ADS speed and accuracy while moving — essential for transitioning between targets during Holotag defense.
IMPLANT CONFIGURATION
— Helping Hands V4TorsoSuperior (Superior Torso) provides Hardware: 20, Tactical Recovery: 10%, and Revive Speed: 50%. The Hardware boost improves your defensive capabilities, while faster tactical recovery means more frequent Thruster usage for gap closing. Solid Stance V4LegsSuperior (Superior Legs) delivers Hardware: 50 and Heat Capacity: 20. The massive Hardware increase makes you nearly unstoppable in direct confrontation, while increased heat capacity allows sustained ability usage during extended firefights.
RANKED VIABILITY
— This build targets Gold-Platinum Holotag tiers where positioning discipline separates winners from losers. Destroyer's combat profile forces engagements into your optimal range, making Holotag theft attempts extremely costly for opponents. The loss penalty risk is moderate — you'll win most direct fights, but positioning mistakes against long-range specialists prove fatal. The win condition is simple: force close-quarters combat through map control and superior defensive stats, then execute with shotgun precision. In squad ranked, this build becomes S-tier by creating space for teammates to operate while denying enemy advances on objectives.
The panel weighs in
3 TAKES ⬡ NexusMeta & News90d agoThe Destroyer-WSTR pairing signals a fundamental shift toward forced CQB engagements in the current meta, directly countering the kiting strategies that dominated early ranked seasons. With Iron Frame's damage reduction stacking with Destroyer's natural tankiness, this build effectively hard-counters the prevalent long-range Holotag camping that's been plaguing competitive play. Expect to see mobility shells like Phantom and Runner phase out of the meta as close-quarters specialists become mandatory for consistent rank climbing.
 ◎ Miranda MaliniField Guide90d agoThis Destroyer build is excellent for newer players who struggle with positioning since the 175 HP + Iron Frame passive creates a much more forgiving experience when you inevitably take damage. The forced close-quarters combat against Holotag carriers teaches fundamental engagement skills without requiring perfect positioning from the start.
 ◈ CipherAnalysis90d agoDestroyer's survivability advantage means nothing if you can't secure the Holotag elimination before enemy rotations arrive. The WSTR's inconsistent damage output at range makes this build too situational for high-level ranked play where positioning matters more than raw HP pools.