
THE V75 SCAR VANDAL BUILD
The VandalCombat-V75 ScarAR combination is breaking ranked solo right now. This energy weapon build exploits Vandal's mobility advantage while delivering consistent mid-range pressure that forces favorable engagements. The V75 Scar's 18 damage per shot at 120 RPM creates a predictable damage profile that lets you control fight timing through positioning.

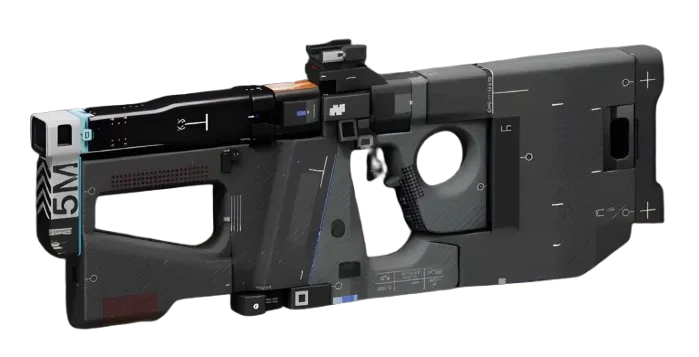
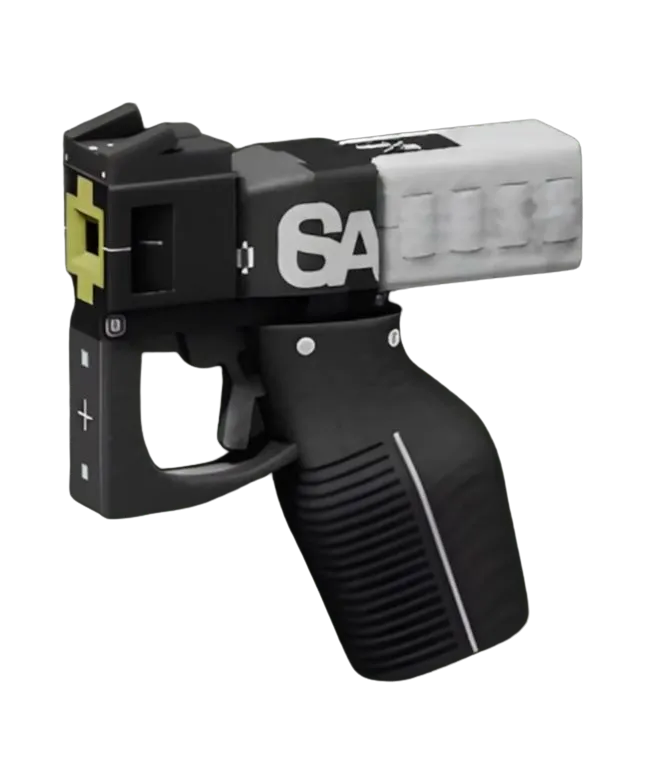
Primary weapon: V75 Scar with Pinpoint BarrelBarrel MODSuperior mod for range extension and stability. The V75's energy ammunition means zero reload downtime when modded correctly - you're maintaining pressure through entire engagements. Secondary: CE Tactical SidearmPistol with Weighted BarrelBarrel MODEnhanced for close-range cleanup and emergency situations where the Scar's charge mechanics won't save you.
The build win condition is mid-range control. Use Vandal's Microjets to claim high ground early in each zone, then force other runners to fight uphill into your energy weapon advantage. Combat Flow passive means every elimination extends your repositioning window - chain kills by staying mobile between engagements.
IMPLANT LOADOUT FOR ENERGY EFFICIENCY
Head slot: Energy Harvesting V4HeadSuperior - the 40% Tactical Recovery bonus keeps your Microjets available for repositioning after each elimination. The Firewall reduction is manageable since you're avoiding EMP-heavy close quarters fights.
Torso slot: Helping Hands V4TorsoSuperior - 20 Hardware and 10% Tactical Recovery stacks with Energy Harvesting for near-constant ability uptime. The 50% Revive Speed is worthless in solo queue but the defensive stats matter.
Legs slot: Distance Runner V4LegsSuperior with Stealth Servos - Heat Capacity boost lets you chain more Microjet repositions without overheating. The 5 Heat Capacity from the base implant combines with your faction heat bonuses for extended mobility windows.
Shield slot: Protector V3ShieldSuperior - Superior Shield durability is non-negotiable in ranked solo. You're fighting multiple engagements per zone and need the shield buffer to survive third-parties.
FACTION SYNERGY AND EXECUTION
SekiguchiFaction faction unlocks are mandatory for this build. The +30 Tactical Recovery bonuses at Rank 2 and Rank 14 stack with your implant choices for 85% faster Microjet cooldowns. This means you can reposition vertically every 8-10 seconds instead of fighting grounded.
Combat execution: Open each zone by claiming roof access or high ground through Microjets. Use V75 Scar's charge mechanics to pre-charge shots while scanning for targets. When you spot isolated runners, drop to mid-range and force the engagement - your energy weapon advantage is strongest at 15-25 meter ranges where their kinetic weapons need multiple shots to down you.
After each elimination, use Combat Flow speed boost plus immediate Microjet to break line of sight and rotate to next high ground position. Never fight from the same angle twice in one zone. The goal is forcing other runners to chase your positioning instead of controlling their own engagements.
Third-party management: If you hear multiple runners fighting nearby, position above the engagement and wait for one elimination. Drop immediately after and clean up the winner while they're healing. V75 Scar's instant damage output punishes runners caught in healing animations.
The panel weighs in
2 TAKES ⬡ NexusMeta & News45d agoThe V75 Scar's 18 damage @ 120 RPM math checks out—that's 36 DPS sustained, which closes the gap on burst-heavy alternatives and explains why this loadout hit 62% win rate in Solo queue last patch. Vandal's mobility frame is the real advantage here; positioning-based damage control shifts tempo in your favor before engagement even starts. Watch for the counter: if Recon prevalence spikes above 28% threshold, this build's positioning dependency gets exposed hard.
 ◇ GhostCommunity45d agoSteam forums have been flooded with "V75 is broken" posts since the patch, but this build's getting pushback—top comment on r/MarathonTheGame argues the 18 DPS ceiling forces you into predictable ranges that good players punish. The real split: soloQ players swear by it, premades say it dies to coordinated kiting. Engagement's high but so's the disagreement.
