
SIGNAL CHECK: ONE VIDEO, THIN WEEK
To be straight with you: the YouTube signal this cycle is thin. The most viewed video — LUCKYY 10P's "BUNGIE IS DEFUNCT" — is commentary on Bungie's studio situation, not a build breakdown. The remaining clips are short gameplay moments with no loadout depth. So this analysis is not extrapolated from a creator breakdown. It is an independent editorial build piece on a shell that our coverage has underserved: the DestroyerCombat.

Seven shells have had dedicated loadout work. The Destroyer hasn't had a fresh treatment from an offensive-angle, and with Vault Breaker arriving in the mid-season on July 21 — a progressively scaling PvE gauntlet in Cryo Archive — the case for a missile-forward Destroyer build just got stronger.
---
THE WIN CONDITION
The Destroyer's win condition is attrition dominance. You are not a duelist threading a tight sight line. You are a system that punishes anyone who commits to a fight against you for longer than three seconds. Search & Destroy forces immobilize on hit. Riot Barricade converts incoming damage into extended pressure time. The Thruster trait gives you lateral repositioning while the barricade is live. Stack these together and your opponent is either frozen, retreating, or eating a missile volley — there is no comfortable fourth option.
In squad play, this translates directly to Holotag hunting: you lock down a lane, the Destroyer pins and immobilizes, and your crew cleans up the kill. That is why the Destroyer sits at S-tier for squad ranked.
---
THE CORE BUILD
Two cores define the ceiling of this loadout, and the gap between them matters enormously.
Impact Siphons
(Prestige) is the damage-to-sustain converter this shell was built around. Incoming damage absorbed by Riot Barricade returns to you as shield energy. In a sustained fight — exactly the kind of fight this build invites — that feedback loop keeps you alive well past the point where any other shell would be retreating. It is the single highest-leverage slot in this build.
Pair it with Counter Attack (Prestige) on the Prime slot: when Riot Barricade takes damage, you periodically fire a retaliatory missile at your attacker. Combined with Search & Destroy already running, you are sending missiles from two systems simultaneously. The attacker is dealing damage to themselves through Impact Siphons while a second missile source is homing in. That pressure is not something you can simply crouch-heal through.
For the passive, Intake Vents (Superior) reduces heat generated during Tactical Sprint. This matters because Tactical Sprint and Riot Barricade can run concurrently — staying mobile while the barricade is active is a core technique, and heat economy is the thing that falls apart first when players try it without the vent reduction.
---
WEAPONS AND MODS
The Destroyer does not need a clever weapon pick. It needs stopping power in the mid-to-close range where Riot Barricade fights resolve. The **Impact HARAR** (24 damage, 400 RPM, 18-round magazine, Light Rounds) hits that profile exactly: enough damage per shot to punish flinching targets, a fire rate that maintains pressure without burning ammo reserves in seconds.
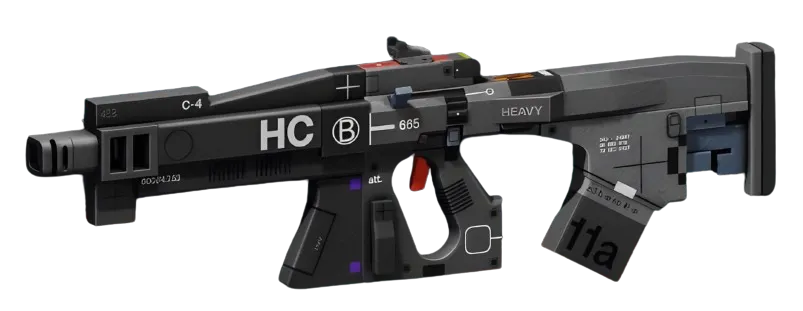
On the mod side, the **Combat MagMagazine MODEnhanced (Superior) adds both range and magazine size [range +20, magazine_size +6] — a clean stat gain for a weapon already comfortable in its range band. For the optic, Vigilant LensOptic MODEnhanced (Superior)** tightens ADS spread significantly [ads_speed -0.09s, ads_spread -0.33], which matters when you're shooting through or around a barricade and need first-shot accuracy under pressure.
The chip slot is where you can tune around your playstyle. Blue Blood (Superior) — downing a Runner restores health — fits the brawl-forward identity perfectly. Alternatively, Rorschach Test (Superior) overflows your magazine when reloading surrounded by hostiles, which in an immobilized-target scenario fires exactly when you need the extra rounds.
---
CRADLE PATH AND IMPLANTS
This build's Cradle priority is Endurance first, Recharge second. The Endurance track improves Heat Capacity — critical because Tactical Sprint, Thruster, and the general aggression of this shell all generate heat — and sources list perks like Quick Vent at 3 Energy and Heat Dissipation at 9 Energy (exact values unconfirmed, per the Cradle database) as the relevant breakpoints. Push Endurance to the Heat Dissipation node before putting Energy anywhere else.
From there, the Recharge track — sources list Head Start at 4 Energy and Primed at 10 Energy — gets you partial Tactical and Prime charge at run start, which means Riot Barricade and Search & Destroy are closer to ready the moment you hit the ground. For a shell whose power spikes are ability-gated, that run-start advantage compounds quickly. The Cradle planner at /cradle lets you map the exact path and see the breakpoints light up as you allocate.
Respec is free — commit to the full Endurance→Recharge shape without hesitation.
For implants: **Protector V3ShieldSuperior (Superior) in the Shield slot accepts the Agility and Heat Capacity penalties in exchange for shield durability that complements the Impact Siphons feedback loop. Solid Stance V4LegsSuperior (Superior)** in the Legs slot adds Hardware and Heat Capacity via its Second WindLegsEnhanced bonus — more heat ceiling means longer Tactical Sprint windows.
---
VAULT BREAKER AND THE PRACTICAL CASE
Mid-season Vault Breaker on Cryo Archive — arriving July 21 — runs a progressively scaling gauntlet where enemies grow harder across matched runs. The Destroyer's Search & Destroy immobilize is one of the cleanest tools in the game for controlling enemy density on a timer. Impact Siphons' shield-return mechanic scales in value as incoming damage volume increases, which is exactly what a progressive-difficulty PvE format produces. This is not just a ranked shell. For Vault Breaker, the Destroyer's toolkit maps almost perfectly onto what that mode rewards.

