
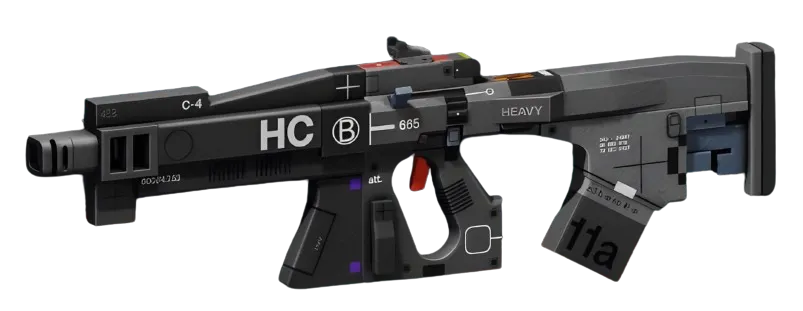
WHY THE ROOK IS WHERE YOU START
Every extraction shooter has a shell — or a class, or a frame — that the game quietly designed to teach you. In Marathon, that shell is the RookFlex. Not because it's the most powerful. Not because it scales to the endgame ceiling. Because it is the most honest shell in the roster: what you put in is what you get out, no tricks, no steep ability learning curve, no squad dependency dragging your score down when you queue solo.

The Rook is a Flex shell. That word matters. Flex means it does not demand a specific playstyle. You can play slow and deliberate, fast and aggressive, looting-first or fighting-first, and the Rook will not punish you for choosing wrong. That forgiveness is exactly what a new Runner needs while learning map rotations, heat management, and when to disengage.
The Rook's stats are listed as unverified in current sources, but qualitatively it sits squarely in the middle of the roster — more health and shield than the AssassinStealth or ThiefStealth, less than the DestroyerCombat, with medium speed that keeps pace with most rotations without demanding the movement discipline the VandalCombat rewards. It can take a hit. It can walk away from a mistake.


THE KIT: WHAT YOU'RE WORKING WITH
The Rook's Prime ability, Recuperation, activates the shell's emergency repair system to slowly restore health — interrupted when you take damage. Think of it as a soft reset button: disengage, find cover, and buy back the health a tough fight cost you. New Runners who haven't yet built the muscle memory for consumable timing will find this ability covers a lot of early errors.
The Tactical, Signal Mask, activates a temporary holodisplay to deceive UESC forces — disrupted if you sprint or take damage. In practice this is a repositioning tool and a breathing-space creator. UESC pressure pinning you to a bad angle? Signal Mask, step sideways, reset. It won't make you a ghost — that's the Assassin's job — but it is enough of a window to change the geometry of a fight.
Neither ability has a high skill floor. You are not asking a new Runner to time a cooldown precisely or manage a squad buff. You are asking them to disengage when hurt and mask when flanking. That is a lesson worth learning now, before they pick up a shell that punishes bad fundamentals.
WEAPONS THAT FIT THE ROOK'S PACE
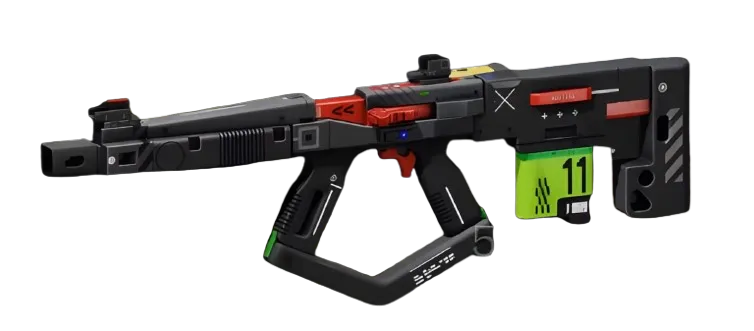
Because the Rook doesn't specialize, it doesn't force a specific weapon into your hands. Two choices that complement its medium-speed, flexible role well:
The **Impact HARAR is a straight line from trigger pull to damage — 24 damage per shot at 400 RPM, confirmed in-game, mid-range. Clean to use, forgiving of slightly imprecise aim, and widely available. Pair it with Trigger Discipline** in the chip slot for the accuracy bonus on initial trigger pull, which tightens your first burst in unexpected engagements.
The **M77 Assault RifleAR** is listed at 16 damage per shot at 450 RPM with Flex range — meaning it transitions between CQB and mid distances without a penalty that kills you. Sources list these figures as unconfirmed in-game, so treat them as directional rather than precise — but the Flex range tag alone makes it worth running while you're still learning which fights to take at which distance.
CRADLE PRIORITIES FOR THE ROOK
The Cradle is where your stats come from in Season 2 — Energy spent across six tracks, shared across all shells, re-spec at any time with no penalty. For a Rook learning the game, two tracks deserve your early Energy.
Endurance is the first. The Quick Vent perk (3 Energy, unverified exact breakpoint) starts heat recovery more quickly after heat-generating actions. Heat is Marathon's stamina system, and new Runners push it constantly without meaning to. Getting recovery started sooner is a direct quality-of-life improvement that makes every run feel smoother.
Recharge is the second. The Head Start perk (4 Energy, unverified exact breakpoint) starts runs with partial Tactical charge. That means Signal Mask is available faster at infil — which matters in the early-run chaos when you haven't yet read the lobby's tempo. As you grow comfortable, Primed at 10 Energy extends that principle to your Prime, so Recuperation is available in that first contested rotation.
Because respec is completely free, do not be afraid to experiment. Try a few points in Dexterity if you want to test the Loot Siphon perk's Tactical energy return on container opens. The Rook's flex nature means almost any Cradle path has something to offer. The planner at /cradle lets you map your Energy path before you commit.
RANKED AND WHEN TO LEAVE THE ROOK BEHIND
The Rook's ranked rating — Solo B, Squad C in current assessments — tells you something important. It is a learning shell, not a climbing shell. In solo queue it holds its own because the kit is self-sufficient; in squad play, it doesn't amplify teammates the way TriageSupport, Destroyer, or ReconIntel do, and that gap widens as lobby skill increases.


The correct exit point from the Rook is when you stop dying to mistakes and start dying to positioning decisions. That's the signal. Mistakes are punished by every shell — the Rook just absorbs them more gracefully. When you're making intentional choices and losing those choices, the Rook has nothing left to teach you. That's when you earn the Vandal, or the Thief, or whichever specialist your playstyle is pulling toward.
Use the Rook. Learn the game. Leave on your terms.
---
TAKEAWAYS
1. Start every session with Recuperation in mind as your escape hatch — disengage at 40% health, not 10%, and let the heal finish before re-engaging. If you take damage during it, you wasted the cooldown.
2. Invest your early Cradle Energy into Endurance (Quick Vent) and Recharge (Head Start) first. Heat control and ability uptime are the two things new Runners feel most immediately.
3. When you're no longer dying to mechanical errors and are instead losing to reads and positioning, the Rook has done its job. Move to a specialist — and use the free respec to rebuild your Cradle path around that shell's strengths.


