
THE SIGNAL THIS CYCLE
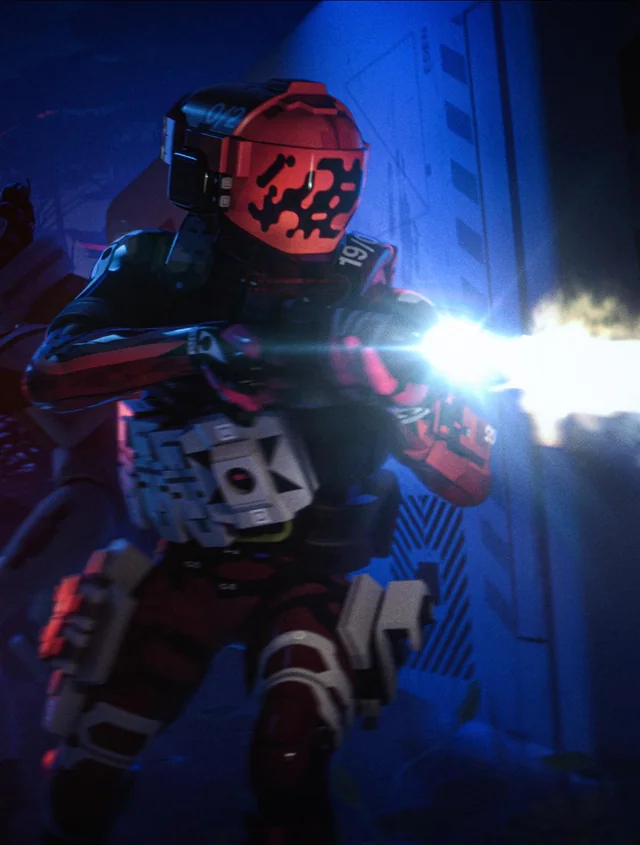
One video this cycle — and it is not a build video. LUCKYY 10P's stream is Destiny 2 news content, unrelated to Marathon loadout theory. So we set it aside entirely and do what the build desk should be doing anyway: find the angle the community is not talking about. The SentinelCombat has appeared in our coverage exactly ten times across the entire season — the single most under-analyzed shell in Marathon. That gap ends here.
THE WIN CONDITION
The Sentinel's kit is built around denial and close-range punishment, not map control or escape. Its Prime ability, Defender System, creates a forward platform that neutralizes incoming grenades and grants weapon stability plus reload speed to anyone standing near it. Its Tactical, Snare Mine, drops proximity-triggered immobilizing submunitions. The Prey Tracker trait feeds you motion data on everything moving in your cone of vision. Castle Doctrine, the second trait, is the whole engine: it accelerates your ready and reload speed for SMGs, Pistols, and Shotguns based on the number of nearby hostiles, and it buffs your Hardware, Firewall, and Self-Repair Speed when you eat splash damage.
The win condition is straightforward — control a chokepoint, let enemies come to you, and stack Castle Doctrine's proximity bonuses so your SMG or shotgun cycles faster than the enemy can process. You are not winning on mechanics or outplay; you are winning because your weapon handles differently the moment a fight gets within ten meters. Force the range, stack the bonus, exfil clean.
THE LOADOUT
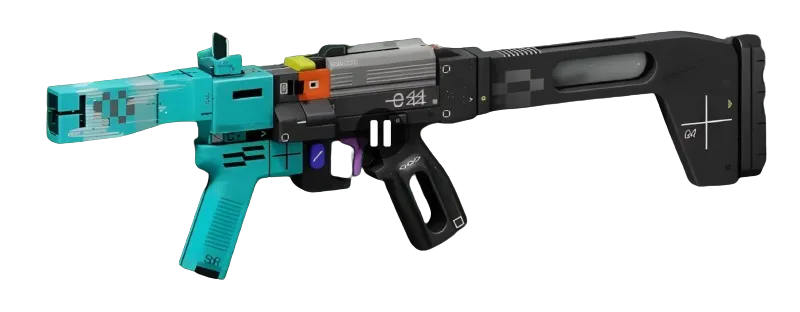
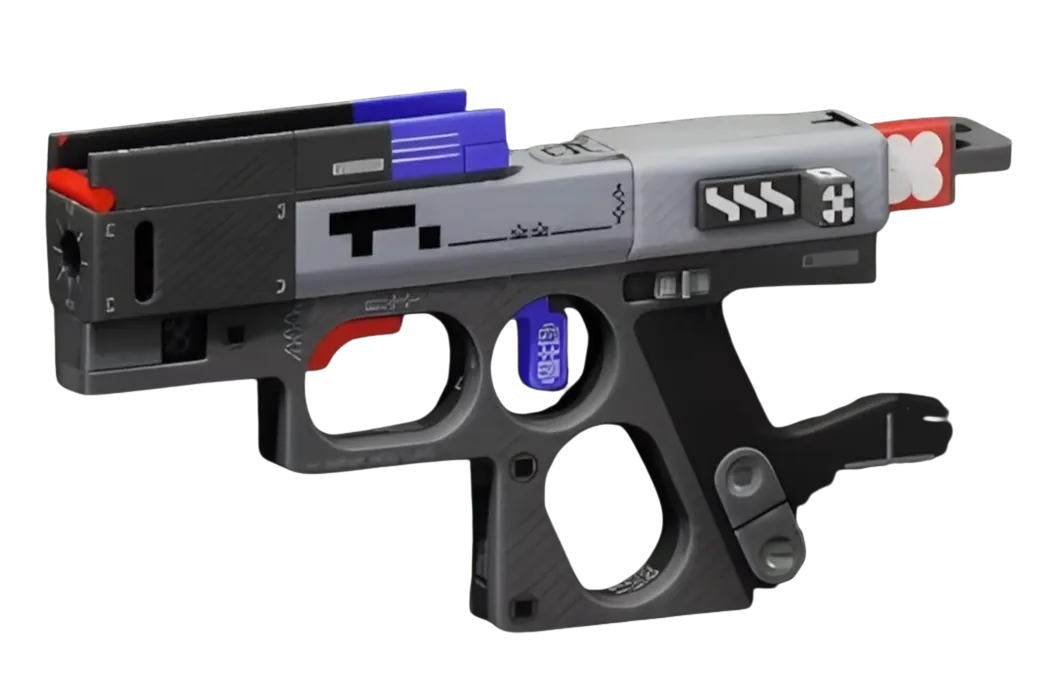
For the primary weapon, the BRRT SMGSMG is the right call here. At 1000 RPM with a 45-round magazine and CQB range, it is purpose-built for Castle Doctrine distances. Slot the Flechette Split ActionBarrel MODPrestige Prestige barrel — it increases stability, handling, and hip-fire accuracy precisely in the close-quarters windows where Sentinel excels — and pair it with a Hi-Cap MagMagazine MODDeluxe (Superior) for the magazine size extension. On the chip slot, Rorschach Test (Superior) is a strong fit: empty-mag reloads overflow the magazine while adding stability and aim assist on activation, and with Castle Doctrine already cycling your reload faster, you will trigger the overflow more frequently than on most other shells. Secondary is the Magnum MCPistol — 41 base damage, mid range, 12-round magazine — it covers the small window where you need a harder single hit before an SMG burst finishes the job.
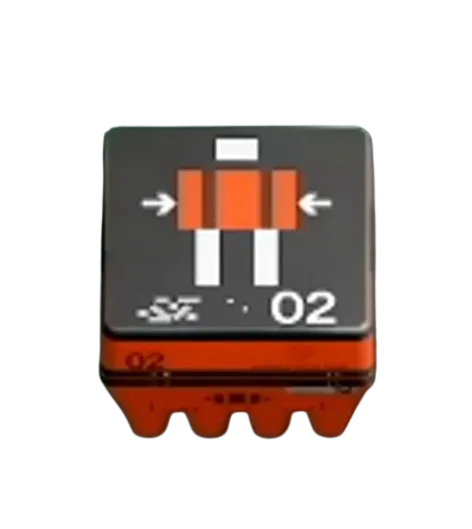
Core selection is narrow but clear. Wellness Beacon (Deluxe) lets you and allies use medical items faster while standing near your Defender System — when you anchor the platform in a chokepoint, this is effectively free survivability without burning a consumable slot faster than intended. Reversal (Enhanced) heals you over time whenever you eliminate an Immobilized target, and Snare Mine will be creating Immobilized targets constantly. Chain Snare Mine into a Castle Doctrine burst, pick up the kill, and Reversal's recovery covers the chip damage Castle Doctrine can't prevent.
Implants: Knife Fight V4TorsoSuperior (Superior) in the torso slot — the hardware penalty is offset by the melee damage and fall resistance bonuses, useful in the dynamic cover play this shell demands. Bionic Leg Upgrades V4LegsSuperior (Superior) in the legs — the Finisher Siphon and Agility stats compound nicely with active chokepoint play. In the head slot, Regen V2HeadEnhanced (Enhanced) gives 30% Self-Repair Speed and 10% Revive Speed, keeping you online between contacts.
CRADLE PATH
The priority here is Endurance and Recharge. Castle Doctrine already patches your hardware with splash resistance, so the bottleneck is heat recovery and ability uptime — the faster your Snare Mines refresh, the more Immobilized kills Reversal can feed off.
Push the Endurance track to the Quick Vent breakpoint (reported at 3 Energy) to get heat recovery starting sooner after movement, then continue toward Heat Dissipation (reported at 9 Energy) for faster overall heat bleed. On the Recharge track, Head Start (reported at 4 Energy) means your Snare Mine enters the match with partial charge — relevant when early engagements happen before you have set up your Defender System. Primed (reported at 10 Energy) follows if you have the budget. Note that all Cradle breakpoints are source-listed but unconfirmed in-game; map the exact path at /cradle. Respec is free, so there is no cost to testing this split versus a heavier Resistance investment.
RANKED VIABILITY AND HOLOTAG TARGETING
The Sentinel targets the mid-tier Holotag bracket. It is not a Holotag theft specialist — it does not have the mobility or stealth to chase targets down or escape after a pick. What it does do is anchor objectives and make third-partying expensive for anyone who tries to push a position you have already committed to. In squad play, the Defender System creates a small but meaningful zone advantage in late-match exfil races: enemies rolling grenades at your exfil position simply do not get the payoff they expect. Eminent Domain (Prestige core) converts those neutralized grenades into lootable items on the floor — economically minor, psychologically significant. Pair with a mobile squad composition (a VandalCombat or ThiefStealth to apply pressure out, Sentinel to hold the extraction anchor) and the shell earns its keep. Solo ranked is a tougher sell; the shell wants enemies to push it, and experienced solo players will simply disengage and wait.


